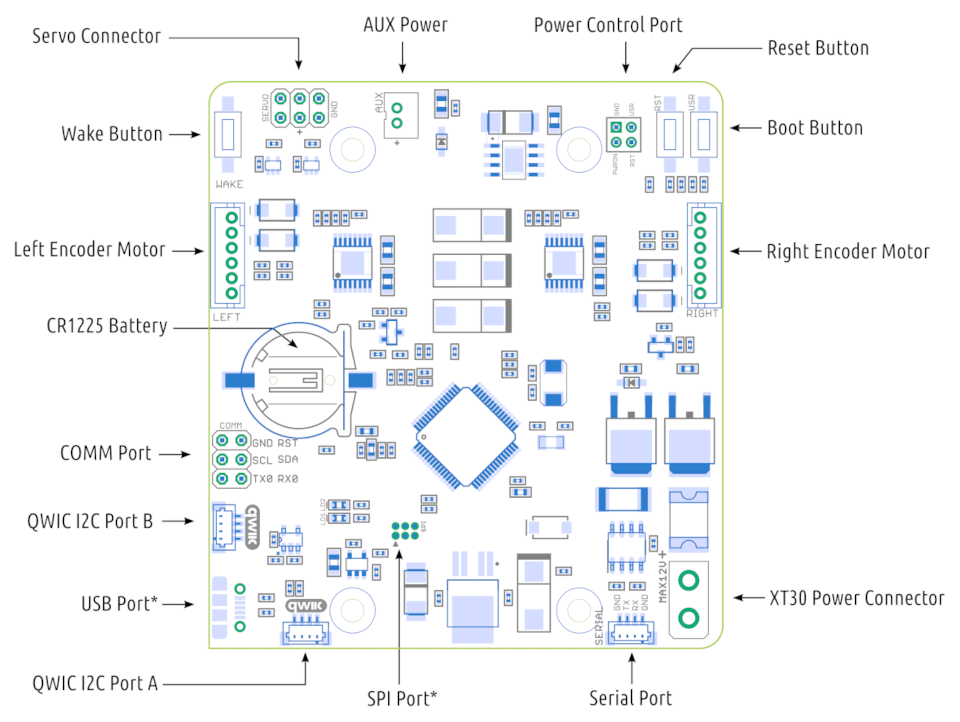


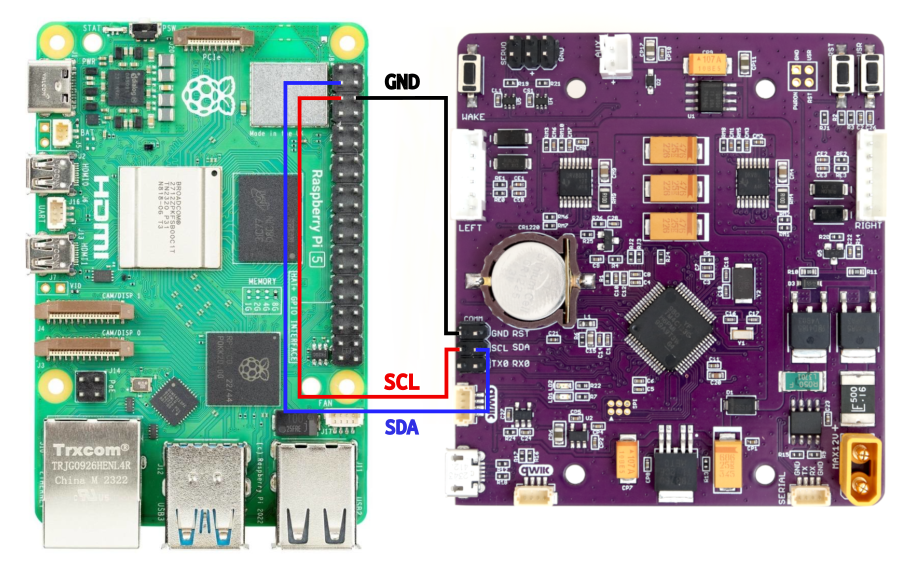
Connecting ROSRider to Raspberry PI
This wiring diagram illustrates direct I2C communication with the Raspberry PI.
To enable I2C communication on a Raspberry Pi running Ubuntu, first ensure I2C is enabled by adding
dtparam=i2c_arm=on to /boot/firmware/config.txt and rebooting.
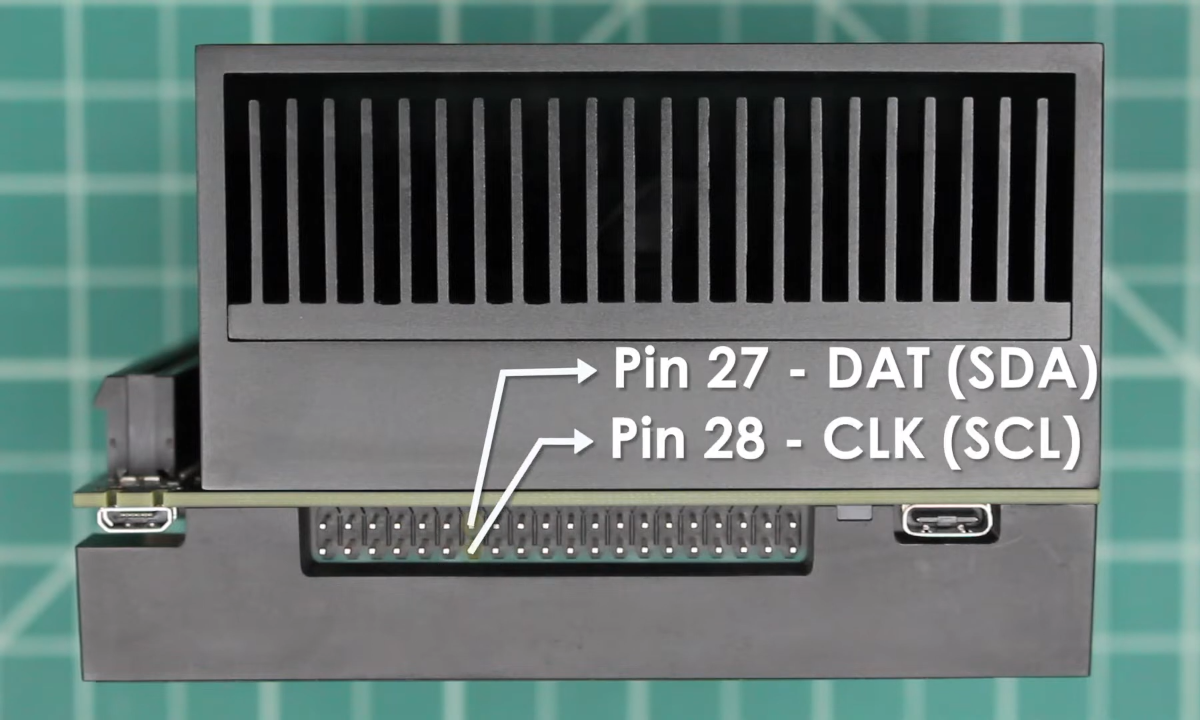
Use jumper wires to connect your Raspberry PI using GPIO pins 2 (SDA) and 3 (SCL).
After installation, verify the connection using sudo i2cdetect -y 1 to detect connected devices.
Detecting I2C Devices
For troubleshooting purposes, you may want to detect I2C devices connected to your computer.
To do this, you can use the i2cdetect command in the terminal. Run the following command to install i2c-tools: sudo apt install i2c-tools.
Use the i2cdetect command to scan the I2C bus and identify connected devices:
sudo i2cdetect -y -r 1

This command will display a table of I2C addresses. The default address of the ROSRider is 0x3C, and the default address of the ROS2RPI card is 0x20.
If you only have a ROSRider connected directly, you should only see the address 0x3C.
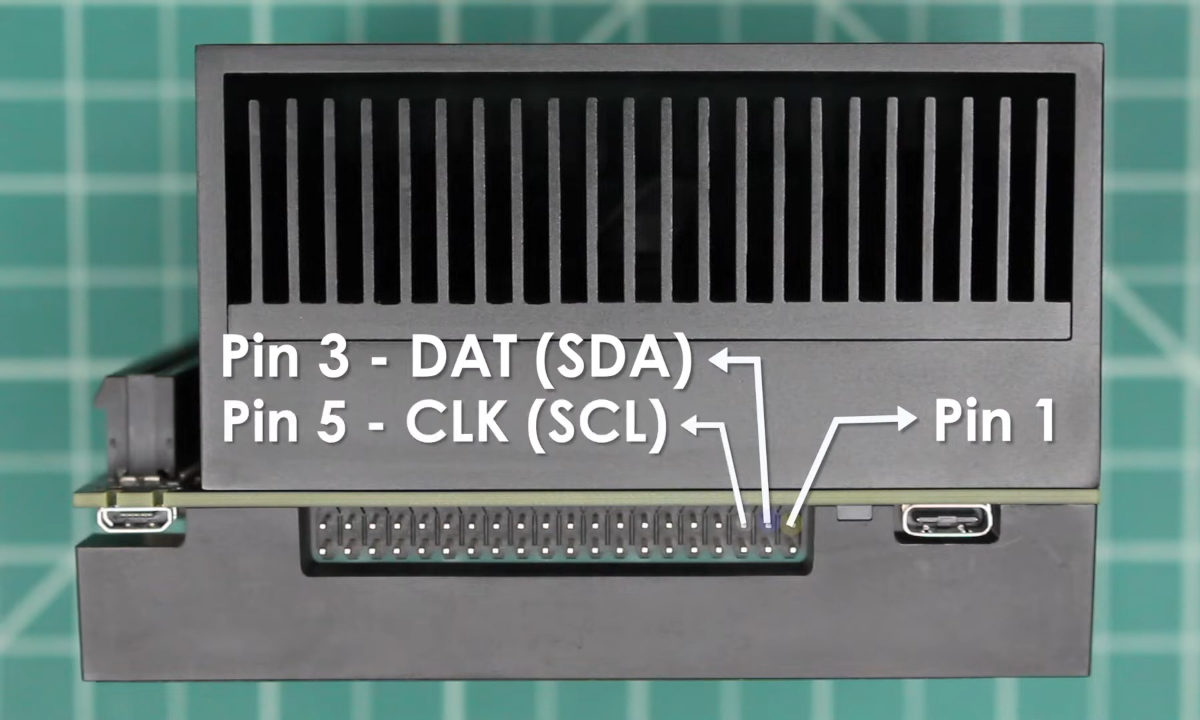
Connecting ROSRider to NVIDIA Jetson
The NVIDIA Jetson has two I2C ports accessible via the header. To ensure proper communication with I2C devices, it’s crucial to configure the I2C voltage level. This is accomplished using a jumper (J514) on the board. To select 3.3V I2C, position the jumper accordingly. To ensure proper I2C communication, verify that I2C is enabled at the kernel level and that your user account has the necessary permissions to access the I2C bus on the host computer.
There are two I2C ports on the Jetson AGX:
Next Chapter: Updating Firmware
Copyright © 2026, ACADA Robotics • https://acada.dev